A breast pump is only one part of a workable pumping setup. The right pump accessories can make sessions more comfortable, help keep milk organized, and reduce small daily frustrations. A poorly fitting flange, for example, may cause discomfort; a missing valve can interrupt a session. These details matter. They are also easy to overlook when choosing gear.
Dr. Ruth A. Lawrence, a pediatrician and breastfeeding researcher, wrote, “Breastfeeding is a natural act, but it is also a learned behavior.” Pumping has its own learning curve, and useful accessories can support a routine without promising effortless results. Needs vary with pump model, work schedule, milk-storage plans, and personal comfort. Compatibility matters: a bottle, flange, or power adapter that does not fit your pump may be little help. Check manufacturer guidance, clean parts as directed, and seek qualified lactation support if pumping causes persistent pain or concerns.
This guide looks at ten practical options, from replacement valves and flange inserts to hands-free bras, storage bags, and cleaning tools. Some solve a clear problem; others may sit unused in a drawer. That happens. The aim is not to buy everything, but to find dependable items that suit your routine, budget, and pump.
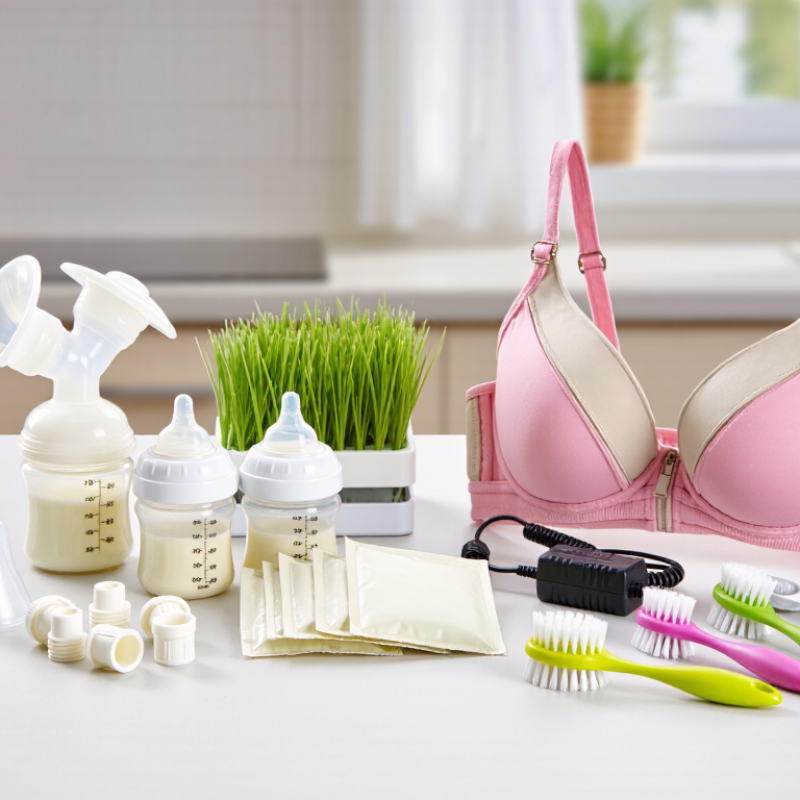
Pump accessories help match equipment to real feeding routines, not just pump models. In the CDC’s 2022 Breastfeeding Report Card, 83.2% of infants born in 2019 had ever breastfed, while 24.9% were exclusively breastfed at six months. These figures show why needs can change over time. A correctly sized flange may reduce rubbing and support comfortable milk removal; a hands-free pumping bra can keep both hands available during a short work break. Spare valves and membranes are useful when small parts are misplaced or worn. Comfort matters.
Storage and cleaning accessories support different schedules. A cooler with ice packs can help keep expressed milk chilled during a commute, while labeled containers make dates easier to check. The CDC advises cleaning pump parts that contact milk after each use. A small brush and a clean drying area can make that task more practical. Accessories cannot guarantee supply, and a setup that works one week may feel wrong the next. That is worth reassessing.
Tips: Check flange fit while pumping; persistent pain is a reason to pause and seek qualified lactation support. Pack one spare small part, and follow current CDC guidance for milk storage and pump cleaning.
How pump accessories support different feeding and pumping needs
Each bar counts accessory examples associated with that need—not sales figures or survey results. Examples include flange inserts and correctly sized flanges for fit, bottles and storage bags for milk collection, pumping bras for hands-free use, compatible cooler or power options for portability, and replacement valves, membranes, or tubing for maintenance. Accessory compatibility varies by pump model; check the manufacturer’s guidance.
A useful pumping setup starts with fit, not a long shopping list. Flange size matters: a tunnel that is too wide or narrow can cause rubbing and discomfort. Check the sizing guidance for your pump, and ask a lactation professional if pain or swelling continues. Small details count.
Match accessories to your routine. If you pump at work, spare valves and membranes can prevent a session from stalling when a part is misplaced. A hands-free bra may help during a commute or desk break, while a cooler bag with an ice pack keeps expressed milk chilled until you can refrigerate it. At home, an extra set of collection bottles can reduce washing between sessions. Confirm that parts fit your pump model; “universal” does not always mean compatible.
Set a budget around what solves a real problem. Replace worn parts according to the pump instructions, but avoid buying several storage systems before you know what you prefer. I would start with one practical upgrade, then notice what feels awkward after a week. That approach is less exciting than a full kit. It can also save money. A small cleaning brush and a clearly labeled container may be more useful than another gadget.
A practical comparison of commonly used breast-pumping accessories. Price ranges are approximate U.S. retail estimates and vary by material, quantity, and seller. Check your pump’s instructions before buying parts; fittings and electrical requirements are not universal.
| Accessory | Typical Cost (USD) | Best For | What to Check Before Buying | Practical Tip |
|---|---|---|---|---|
| Flange-sizing tool or compatible inserts | About $5–$25 | Improving flange fit and comfort | Measure nipple diameter and follow the pump maker’s sizing guidance. Inserts must fit the specific flange shape and material. | A flange that is too tight or too loose can be uncomfortable. Recheck fit if pumping becomes painful or output changes. |
| Hands-free pumping bra | About $15–$40 | People who want to pump without holding the flanges | Confirm that the openings hold your flange securely and that the bra fits comfortably without compressing the breast. | Some bras work with standard flanges but may not support every wearable or specialty collection cup. |
| Spare collection bottles and pump kit | About $10–$30 per set | Frequent pumping, workdays, or reducing between-session washing | Check connector style, bottle threads, valve type, and the pump model’s compatibility list. | A second complete set can make it easier to keep clean parts ready for the next session. |
| Replacement valves and membranes | About $5–$20 per pack | Maintaining suction as pump parts wear | Match the part to the exact pump or collection kit; similar-looking parts may not fit or perform alike. | Inspect parts regularly and replace them when damaged, stretched, or no longer working as expected, following the manufacturer’s guidance. |
| Breast-milk storage bags or containers | About $8–$20 per pack of bags; reusable containers vary | Storing milk in a refrigerator or freezer | Choose food-safe products intended for breast milk. Check whether bags connect directly to your pump before relying on that feature. | Label milk with the date expressed and use storage guidance from a reliable health authority. |
| Insulated cooler and frozen ice packs | About $15–$45 for a cooler; ice packs often cost extra | Transporting expressed milk away from home | Look for enough room for milk containers and ice packs; the cooler needs to stay closed and cold during transport. | CDC guidance says expressed milk can be kept in an insulated cooler with frozen ice packs for up to 24 hours. |
| Pump-parts cleaning brush | About $3–$10 | Cleaning small pieces and narrow bottle openings | Choose a brush sized for the parts you use, and keep it clean and dry between uses. | Follow the pump and public-health cleaning instructions for washing and sanitizing parts, especially for infants at higher risk of infection. |
| Drying rack or clean drying mat | About $8–$25 | Air-drying washed pump parts without using a shared dish towel | Allow enough space for parts to dry fully and keep the rack or mat clean. | Air-dry parts thoroughly before storing them; avoid wiping them dry with a used towel. |
| Pump carry bag | About $20–$60 | Commuting or organizing a pump and its accessories | Check the dimensions against your pump, power supply, bottles, and any cooler you plan to carry. | Separate clean parts from used parts with clean, sealed containers or bags. |
| Manufacturer-approved power adapter or battery | About $15–$60 | Pumping where a wall outlet is not convenient | Verify the pump’s required voltage, connector, and approved power options. Do not assume a generic adapter or power bank is suitable. | Use only power accessories permitted by the pump manufacturer to help avoid damage or unsafe operation. |
Collection accessories should make milk easy to identify, chill, and carry. Use clean, food-grade containers with tight lids, or purpose-made milk storage bags. Leave room at the top: milk expands when frozen. Add the date and amount before storing, and use the oldest milk first. A waterproof label helps when several containers share a refrigerator shelf. In the CDC’s 2022 Breastfeeding Report Card, 83.2% of infants born in 2019 had ever been breastfed, showing how many families may need practical feeding and storage routines. The CDC advises using freshly expressed milk within four hours at room temperature, four days in a refrigerator, or six months in a freezer for best quality.
Tips: Keep a small cooler and frozen ice packs ready for travel. Place milk in the cooler as soon as possible, and check that containers stay upright. At home, store milk toward the back of the refrigerator, not in the door, where temperatures fluctuate. I still find labeling easy to forget on a rushed day. A marker beside the pump can help. Small details matter. Follow current CDC guidance for storage times, and discard milk when its safety is uncertain.
Comfort and mobility accessories can make pumping easier to fit around real life. A hands-free pumping bra holds collection cups or flanges in place, leaving your hands free to answer a message or settle a baby. Small details matter. A correctly sized flange insert may reduce rubbing, while soft breast cushions can feel gentler against sensitive skin. Fit varies, though; persistent pain is a reason to pause and ask a lactation professional for help.
For outings, a small insulated cooler bag, sealed milk containers, and a spare set of valves can prevent rushed packing. A portable battery may help when an outlet is far from your usual chair. CDC’s 2022 Breastfeeding Report Card found that 55.8% of infants born in 2019 received breast milk at six months, while 24.9% were exclusively breastfed through six months. These population figures do not show that accessories improve feeding outcomes, but they highlight how many families may need practical support over time. Convenience is not always comfort: wearable equipment can feel bulky, and extra parts mean more cleaning. Test accessories at home before relying on them during a commute or workday.
A useful accessory should fit your pump model, not just look similar. Check the connector shape, flange size, valve type, and bottle thread before buying replacements. Even a small mismatch can reduce suction or cause leaks. Keep the pump’s instructions nearby; compatibility details are easy to forget.
Tips: Measure carefully, and compare parts with your pump’s manual. Label small valves by size. A quick photo of the original setup can help when ordering replacements.
Clean milk-contact parts after each use, following the manufacturer’s guidance. Wash them with warm, soapy water, rinse well, and let them air-dry on a clean surface. Don’t use cracked valves or cloudy tubing; replace damaged pieces as directed. Keep electrical components dry, and never immerse the motor. If pumping becomes painful or suction changes unexpectedly, pause and check the fit and assembly. It’s tempting to keep adjusting by guesswork, but a qualified lactation professional can help identify the issue. Not every accessory is necessary. Choose pieces that solve a specific need and are simple to maintain.